Ingest real-time data from OPC UA into Warp 10 using Telegraf.
Warp 10 is sized to handle deep history, very large infrastructures at any scale, and obviously, small ones. In this post, I will show you how to build a Data Historian with Warp 10, Telegraf, and OPC UA.
Introduction
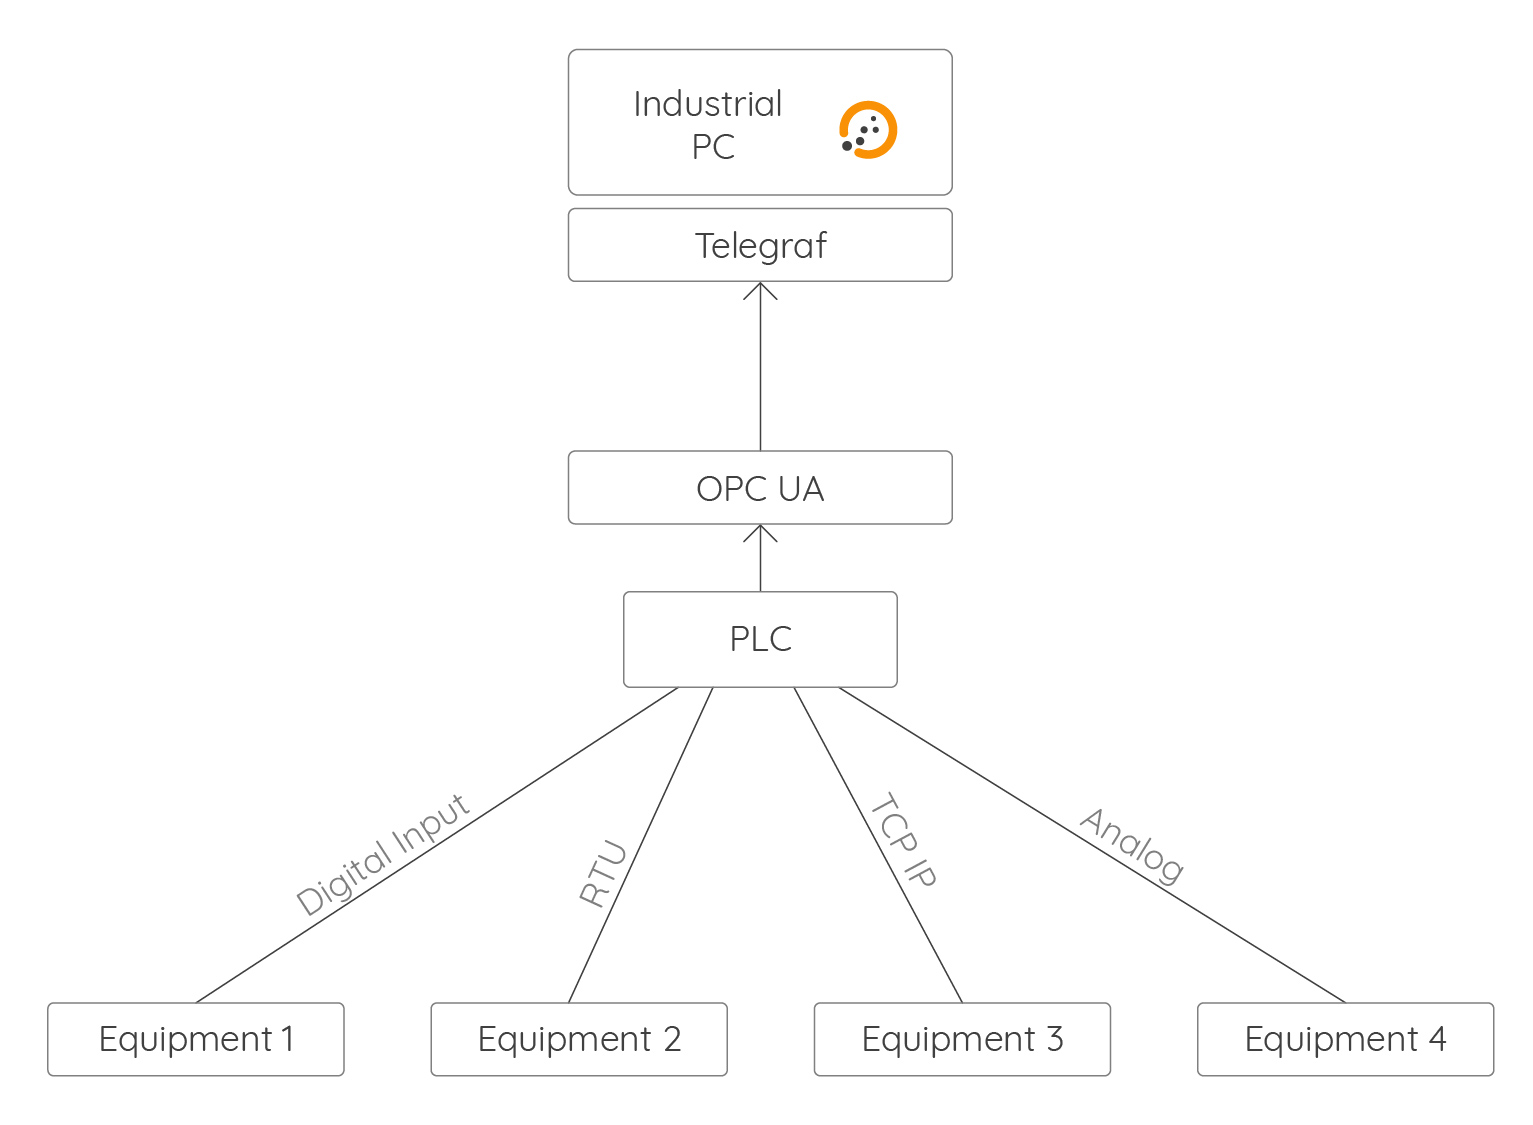
The architecture is split into 2 parts:
1. PLC (Programmable Logic Controller)
This automation is doing all the RealTime control commands at 100ms, and it collects and centralizes data from all equipment. This PLC can use Modbus TCP/IP, Modbus RTU, CanBus, Digital Input, etc…
2. Industrial Computer (Linux–Debian)
This computer is in charge of hosting the Time Series Database (Warp 10–STANDALONE), where data will be Store and Forward into a cloud TimeSeries (Warp 10–STANDALONE):
- Keep local data for 1 month
- Forward data each X time.
In order to allow the communication between those two parts, we are going to use:
- OPC UA
- Telegraf
You can find below the final architecture:
What is OPC UA?
OPC is the interoperability standard for secure and reliable data exchange in the industrial automation space and in other industries. It is platform-independent and ensures the seamless flow of information among devices from multiple vendors.
The OPC Foundation is responsible for the development and maintenance of this standard. The OPC standard is a series of specifications developed by industry vendors, end-users, and software developers. These specifications define the interface between Clients and Servers, as well as Servers and Servers, including access to real-time data, monitoring of alarms and events, access to historical data, and other applications.
Initially, the OPC standard was restricted to the Windows operating system. As such, the acronym OPC was borne from OLE (object linking and embedding) for Process Control. We now know these specifications as OPC Classic.
With the introduction of service-oriented architectures in manufacturing systems came new challenges in security and data modeling. The OPC Foundation developed the OPC UA specifications to address these needs and at the same time provided a feature-rich technology open-platform architecture that was future-proof, scalable, and extensible.
The official documentation is available here and here.
Where will it be installed?
For this case, I am using a Beckhoff automation FreeBSD, which is able to own an OPC UA server, and generate all the configuration from Pragma ({attribute 'OPC.UA.DA' := '1'}).
For this reason at the end, the OPC UA server will be running on the PLC.
If you don't have OPC UA server you can try to use this link.
What is Telegraf?
Telegraf is an open-source server agent that uses a plugin architecture to create maximum flexibility for data collection on sensors, IoT, and other edge computing devices.
Telegraf comes as a single binary, which means that you only need to install the single package to use it.
Installation
Telegraf will be installed on the Industrial computer. Make sure you install it using Telegraf user.
Telegraf configuration
You can find an example of Telegraf config file for OPC UA server here.
In my case, for the communication between Telegraf and OPC UA, I am only using UserName authentification, without certificate encryption.
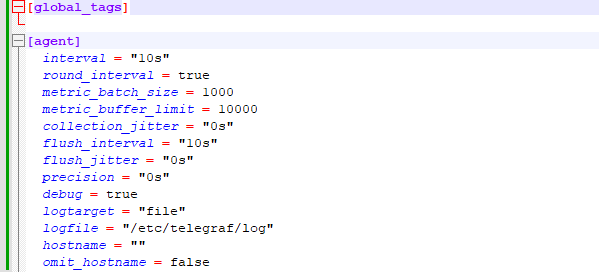
My config File is split into 3 parts:
1. global_tags & agent
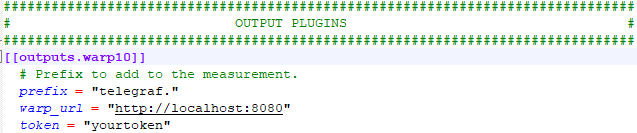
2. OUTPUT PLUGINS (Warp 10 plugin)
3. INPUT PLUGINS (OPC UA plugin)
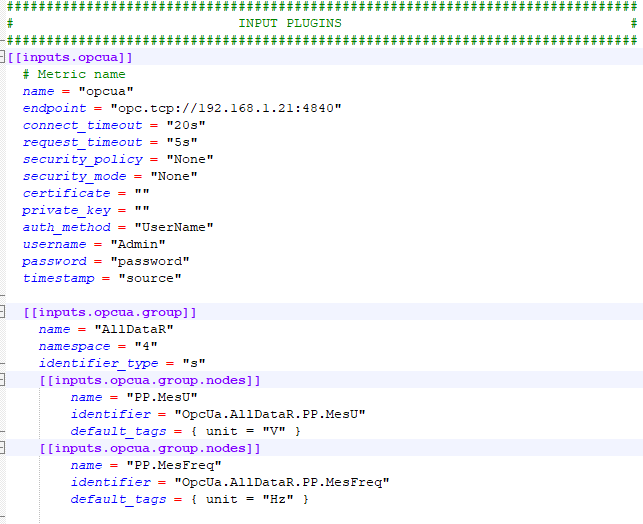
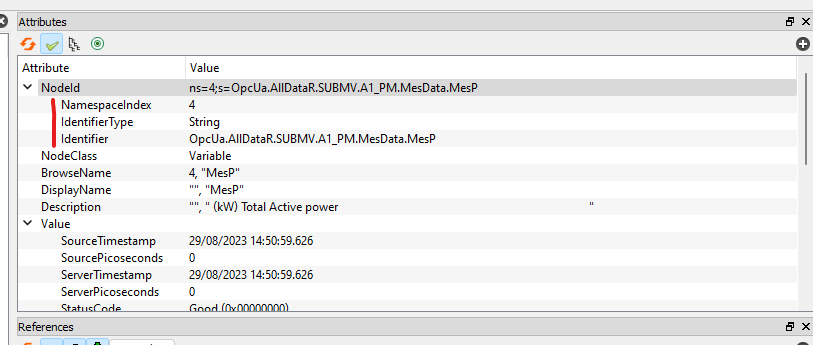
In order to help you find the namespace & identifier_type & identifier, you can use any OPC UA client. I am using UaExpert.
Once you have created your config file in /etc/telegraf/telegraf.conf, you can restart the Telegraf service.
| Read more: Server monitoring with Warp 10 and Telegraf |
The result
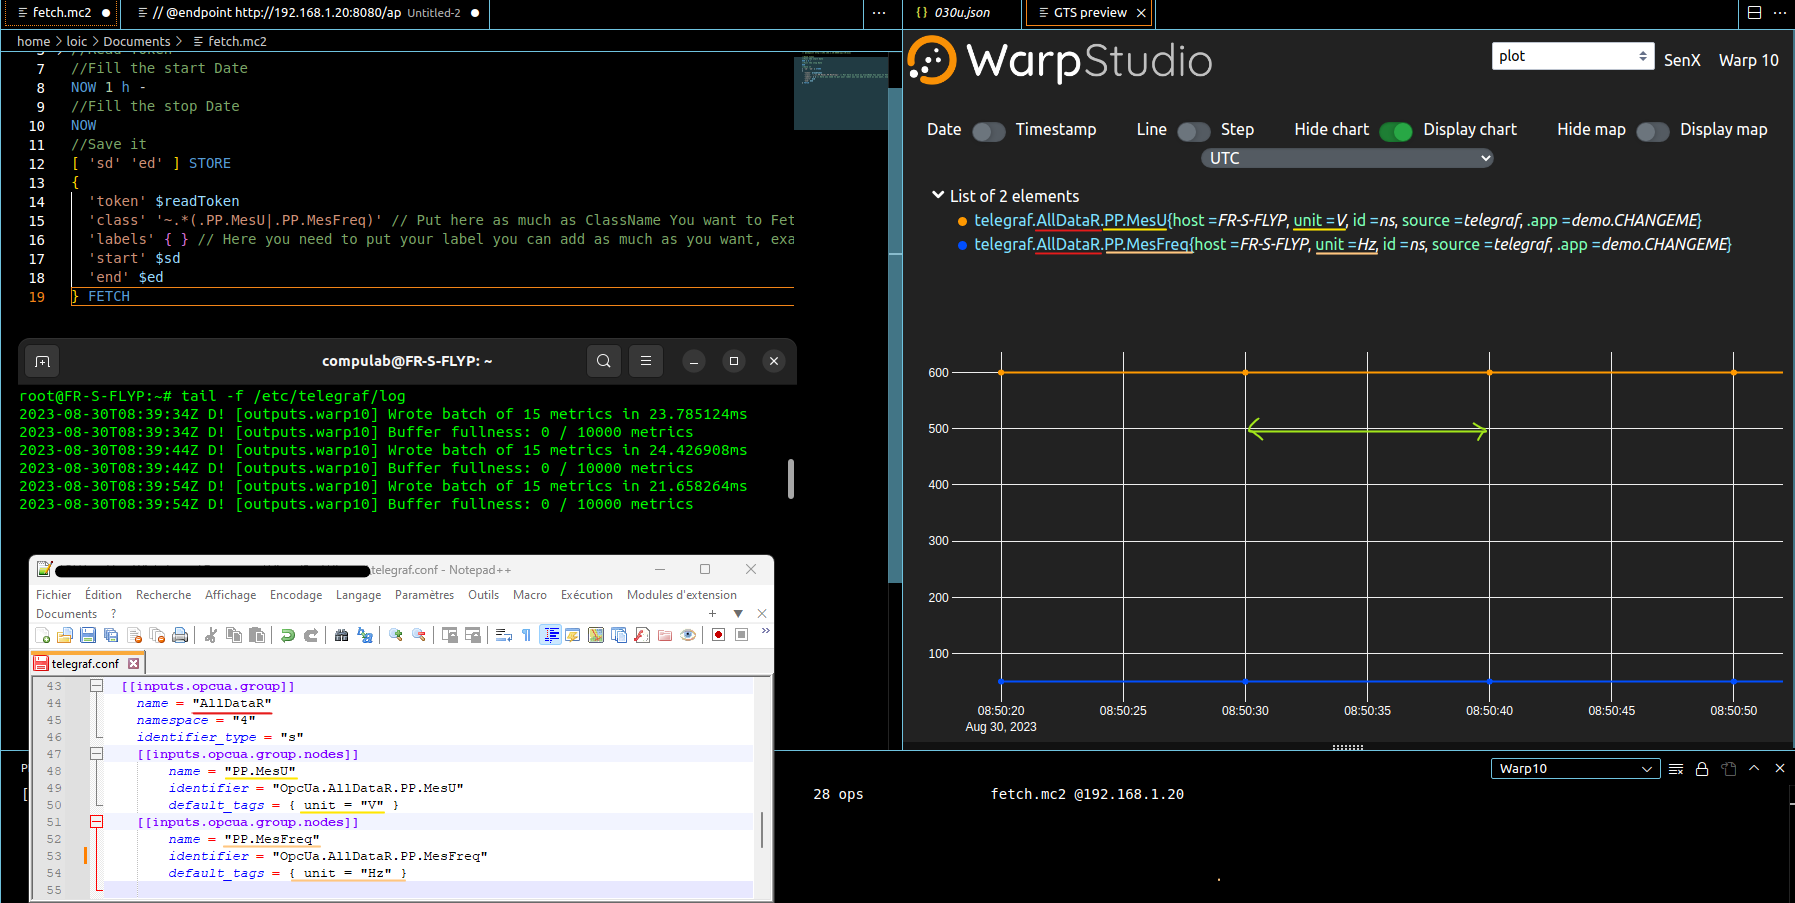
As you can see in the picture above:
1. The name of the GTS will be the concatenation of:
prefix = "telegraf."( You can update it in[[outputs.warp10]]part in telegraf.congname = "PP.MesU"( In the[[inputs.opcua.group.nodes]]part )
2. The labels of the GTS will be created as the following:
- Default labels:
"id": "ns=4;s=identifer"(Identifier is a parameter in the[[inputs.opcua.group.nodes]]part) - Customs labels:
defaut_tags = { your_Tag1=1, your_Tag2=2 }(defaut_tags is a paramterin the[[inputs.opcua.group.nodes]]part)
3. The collection rate is 10s, you can change this parameter here: interval = "10s" (in the [agent] part)
Comments
1. In the [[inputs.opcua]] part if you select timestamp = "source", if the value is not updated by the PLC, Telegraf will save it with the same timestamp. Warp 10 will just update the value and won't create a new one, because the timestamp already exists. The result is interesting because it is similar to a "LogOnChange".
2. If you want to use SecurityPolicy, you can, but there is a small trick on Telegraf's side. You must specify the path of your certificate & private_key (In [[inputs.opcua]]), that you previously generated. You have a link here.
If you are not doing this operation, Telegraf is going to generate a pair of new certificates at each start, but your OPC UA is asking you to TRUST the certificate and restart Telegraf. You will have an endless loop!
To go further
At the end of this article, you are now able to ingest real-time data from OPC UA into Warp 10.
This ingestion process is done locally on edge equipment, and you can use the power of a real time series database to implement your HMI or your alarm dataviz.
If you want to implement a Store & Forward system to push local Warp 10 data to a remote Warp 10 server, keep reading with these articles:
- Edge computing: Build your own IoT Platform
- Warp 10 talking to Warp 10
- Real-Time Monitoring: Setting Up Alerts, Notifications & Dashboard
Read more
The Py4J plugin for Warp 10
Archiving Time Series Data into Amazon S3
Server monitoring with Warp 10 and Telegraf
Digital Innovation Manager
— Guest author —