Discover how to plug Apache NiFi and Warp 10 together. Take profit of the Warp 10 Analytics Engine within your dataflow pipelines.
Apache NiFi is a powerful distributed data pipeline processor and therefore, relatively easy to handle.
If you want to pipe data treatments like an ETL could do, NiFi is a solid candidate. Here is how NiFi interacts with Warp 10.
In this blog post, we will discover our NiFi processor which embeds the Warp 10 Analytics Engine.
NiFi Setup
At first, download NiFi and extract it somewhere, let say in /opt/nifi.
Download our latest nifi-warp10-processor release and place it in /opt/nifi/extensions.
Then, create a configuration file for Warp 10: /opt/nifi/warp.conf
warp.timeunits = us
warpfleet.macros.repos = https://warpfleet.senx.io/macros
warpscript.extension.debug = io.warp10.script.ext.debug.DebugWarpScriptExtension
warpscript.extension.logging = io.warp10.script.ext.logging.LoggingWarpScriptExtension
warpscript.extension.sensision = io.warp10.script.ext.sensision.SensisionWarpScriptExtension
warpscript.extension.rexec = io.warp10.script.ext.rexec.RexecWarpScriptExtension
warpscript.rexec.endpoint.patterns = .*
warpscript.extension.http=io.warp10.script.ext.http.HttpWarpScriptExtension
warpscript.http.maxrequests=10
warpscript.http.host.patterns=.*
webcall.host.patterns = .*
We can activate some Warp 10 extensions.
To do so, edit /opt/nifi/bin/nifi-env.sh and add:
export WARP10_CONFIG=/opt/nifi/warp.confNiFi is ready to start, but, you have to create credentials first.
$ ./bin/nifi.sh set-single-user-credentials <username> <password>
$ /opt/nifi/bin/nifi.sh start
Now go to https://localhost:8443/nifi/ in order to edit your first flow.
First flow
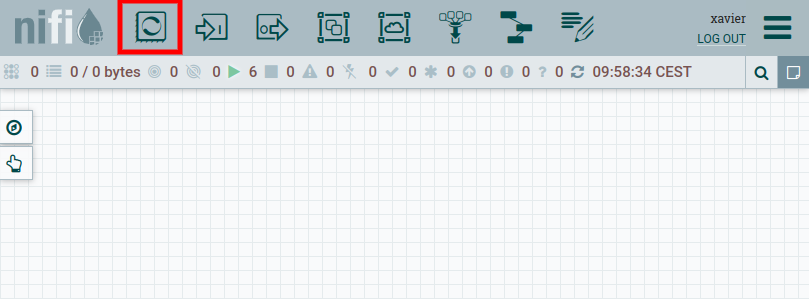
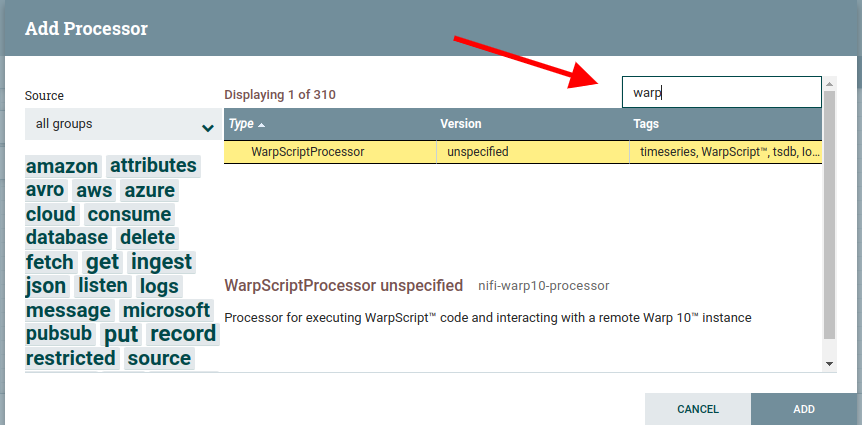
Add the WarpScript processor.
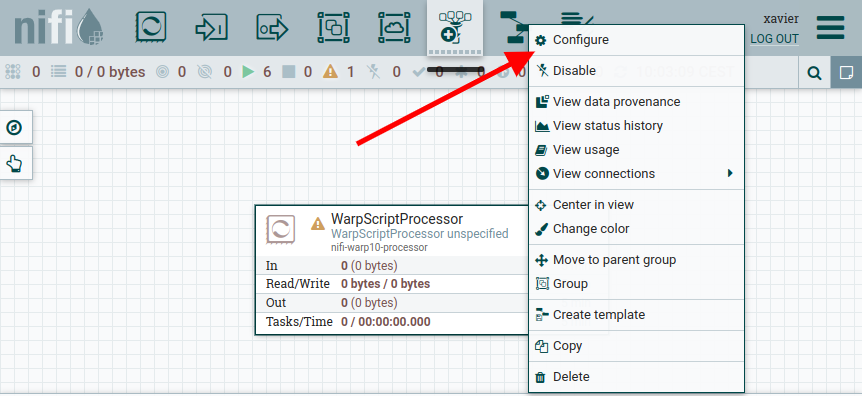
Then, right-click on the processor block and choose "Configure"
Now we will produce a random value and put it in a fake GTS and store it into our Sandbox. Go to https://sandbox.senx.io/ and generate tokens.
In the "Properties" tab, double-click on "WarpScript" to edit:
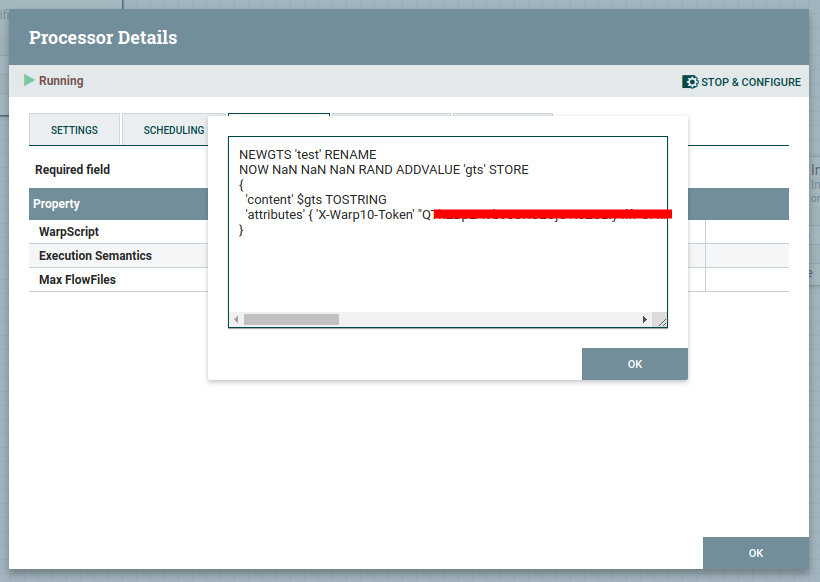
The processor has to produce a map as a result. This map contains the FlowFile content and an attributes map.
If you want to produce multiple messages, produce as many result maps as you wish.
Then, click "Ok", switch to the "Scheduling" tab, and set "Run Schedule" to "5 sec".
We will now generate random data each second.
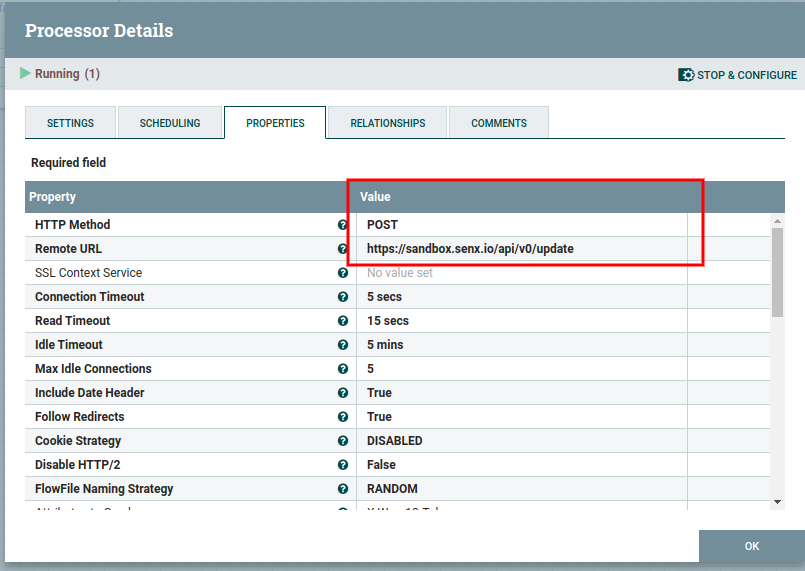
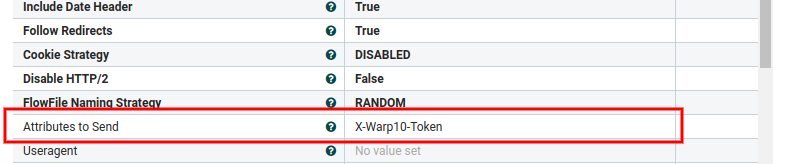
Now add an "InvokeHTTP" Controller and configure it:
Then set relationship terminations.

Add the link on "Success" for both processors:

And finally, start both processors.
Finally, you can use WarpStudio and read token to check if it works.
'your read token' 'token' STORE
[ $token '~.*' {} NOW 1 h ] FETCH
Process a message with WarpScript
We have seen how to produce messages with the WarpScript processor, now, we will handle a message and perform an HTTP Post request with the WarpScript processor.
First, stop both processors and delete the relationship (empty the queue before) and the InvokeHTTP processor.
When a message is sent to the WarpScript processor, there is a map at the top of the stack that contains:
entryDate: EntryDate in platform time units since the Unix EpochlineageStartDate: LineageStartDate in platform time units since the Unix EpochfileSize: FlowFile size in byteslastQueueDate: LastQueueDate in platform time units since the Unix Epochid: FlowFile idlineageStartIndex: FlowFile LineageStartIndex valuequeueDateIndex: FlowFile QueueDateIndexpenalized: FlowFile penalized flagattributes: Map of FlowFile attributescontent: FlowFile content as a byte array
Edit the WarpScript and handle the message. Retrieve the token (into an attribute) and the GTS (the content):
'message' STORE
$message 'content' GET 'UTF-8' BYTES-> 'body' STORE   // decode the payload
$message 'attributes' GET 'X-Warp10-Token' GET 'token' STORE  // get the write token
{
  'url' 'https://sandbox.senx.io/api/v0/update'
  'method' 'POST'
  'headers' { "X-Warp10-Token" $token }
  'body' $body
}
HTTP
And tadaaa!!
WarpFleetResolver
As a good practice, you should develop macros in order to simplify and factorize your code. You can setup your own WarpFleetResolver server (or user WarpFleetSync). You can use https://www.redhat.com/sysadmin/simple-http-server for example.
Create mc2 files containing previous WarpScript in a folder:
/path/to/my/macros/
    |- me
    |   |- generateGTS.mc2
    |   |- insertData.mc2
Stop Nifi and replace previous processors WarpScripts with their corresponding macros:
- @me/generateGTS
- @me/insertData
Start the HTTP server:
$ cd /path/to/my/macros
$ python -m http.server
Edit /opt/nifi/warp.conf in order to add our new repo:
warp.timeunits = us

// Comma separated list of default WarpFleet™ repositories
warpfleet.macros.repos = https://warpfleet.senx.io/macros,http://localhost:8000/

warpscript.extension.debug = io.warp10.script.ext.debug.DebugWarpScriptExtension
warpscript.extension.logging = io.warp10.script.ext.logging.LoggingWarpScriptExtension
warpscript.extension.sensision = io.warp10.script.ext.sensision.SensisionWarpScriptExtension
warpscript.extension.rexec = io.warp10.script.ext.rexec.RexecWarpScriptExtension
warpscript.rexec.endpoint.patterns = .*
warpscript.extension.http=io.warp10.script.ext.http.HttpWarpScriptExtension
warpscript.http.maxrequests=10
warpscript.http.host.patterns=.*
webcall.host.patterns = .*
Start NiFi, and it works 🙂
Going further
You can use Sensision to collect metrics from your flows. You must have a sensision instance running on your NiFi server. To make it work, add those lines at the bottom of /opt/nifi/conf/bootstrap.conf:
[...]
java.arg.20=-Dsensision.events.dir=/var/run/sensision/metrics
java.arg.21=-Dsensision.server.port=0
java.arg.22=-Dsensision.default.labels=instance=Nifi,env=dev
Restart NiFi and now you can gather metrics within your WarpScripts executed by WarpScript processors with SENSISION.EVENT:
[ 'senx.nifi.scripts.run' { 'name' 'me.generateGTS' } T ] SENSISION.EVENT
// or
[ 'senx.nifi.scripts.metrics' { 'name' 'me.insertData' } $gts SIZE ] SENSISION.EVENT
More about SENSISION.EVENT.
Read more
2022 review of the Warp 10 platform
Building a Data Historian based on OPC UA, Warp 10, and Telegraf
Conversions to Apache Arrow format

Senior Software Engineer