Add a download tile to download your Discovery dashboard in the format of your choice.
If you want to download your Warp 10 data from your Discovery Dashboard as JSON, CSV, or any other file, you are in the right place.
The main goal here is to use the ability of Discovery to understand HTML code with the display tile (here is a simple example).
In this tutorial, we'll create a download button tile that you can easily add to your Discovery dashboard.
The full code
Here is the full HTML page :
<!DOCTYPE html>
<html lang="en">
<head>
<meta charset="UTF-8">
<title>File Download Example</title>
<script>
function downloadJSON(jsonData) {
  fileName = "data.json";
  // Convert JSON object to a string and encode it to make it safe for URI.
  const jsonString = encodeURIComponent(JSON.stringify(jsonData));
  // Create a data URI.
  const dataUri = `data:application/json;charset=utf-8,${jsonString}`;
  // Create a temporary anchor element and trigger download.
  const a = document.createElement('a');
  a.href = dataUri;
  a.download = fileName;
  document.body.appendChild(a); // Append the anchor to the document.
  a.click(); // Trigger the download.
  document.body.removeChild(a); // Clean up and remove the anchor from the document.
}
</script>
<script nomodule src="https://unpkg.com/@senx/discovery-widgets/dist/discovery/discovery.js"></script>
<script type="module" src="https://unpkg.com/@senx/discovery-widgets/dist/discovery/discovery.esm.js"></script>
</head>
<body>
<discovery-dashboard url="https://sandbox.senx.io/api/v0/exec" dashboard-title="File Download Example">
  {
      'title' 'File Download Example'
      'description' 'Download Example'
      'tiles' [
          {
              'title' 'Download'
              'type' 'display'
              'x' 5 'y' 0 'w' 2 'h' 1
              'macro' <%
                  "<" "button style='background-color: DodgerBlue;' onclick='downloadJSON( {{my_json}} )' >Download</button>"

                  {
                      "my_json" { "WARP" 7 3 + } ->JSON
                  } TEMPLATE
                  +
              %>
          }
      ]
  }
</discovery-dashboard>
<table id="table" style="border: 1px solid;" hidden></table>
</body>
</html>
The JavaScript Function
Examples are good to understand but practicing is even better 😀. You can try this HTML code at home. We'll start by breaking down this code.
First of all, we define a download function in javascript that takes as argument a JSON:
function downloadJSON(jsonData) {
    fileName = "data.json";
    // Convert JSON object to a string and encode it to make it safe for URI.
    const jsonString = encodeURIComponent(JSON.stringify(jsonData));
    // Create a data URI.
    const dataUri = `data:application/json;charset=utf-8,${jsonString}`;
    // Create a temporary anchor element and trigger download.
    const a = document.createElement('a');
    a.href = dataUri;
    a.download = fileName;
    document.body.appendChild(a); // Append the anchor to the document.
    a.click(); // Trigger the download.
    document.body.removeChild(a); // Clean up and remove the anchor from the document.
}
The Discovery tile
After that, the goal is to use that function in a tile to be able to pass (as argument) data coming from our Warp 10 environment.
In our code here, the environment is the Sandbox. We defined it in the attribute URL of the discovery-dashboard tag (see code above).
Here is our tile :
{
   'title' 'Download'
   'type' 'display'
   'x' 5 'y' 0 'w' 2 'h' 1
   'macro' <%
       "<" "button style='background-color: DodgerBlue;' onclick='downloadJSON( {{my_json}} )' >Download</button>"

       {
           "my_json" { "WARP" 7 3 + } ->JSON
       } TEMPLATE
       +
   %>
}
Here is the result:
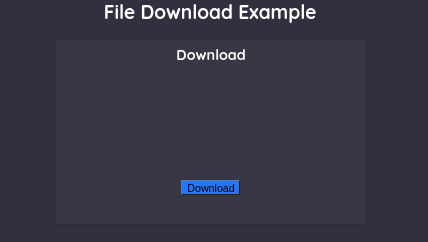
As you see, we inject JSON data after running some WarpScript code. Note that we need to escape the < from the button tag name to avoid the HTML page adding the tag to the page.
Example with Discovery Explorer
If you are using Discovery Explorer, you will not need to make the separation between ‘<’ and ‘button’ as we did before. However, it will be necessary to inline your full javascript function in a template, since you only run WarpScript.
Here, find an example for Discovery Explorer with the same JavaScript function included in a template and a line with some random data.
The result:
You can also find here the example for Discovery that we saw above.
Conclusion
This little trick enables you to include a download of your Warp 10 data using a little bit of JavaScript. You are free to imagine other kinds of downloads like xlsx, csv, or other files by changing your JavaScript code.
| If you have any questions about Discovery (or any other tool on the Warp 10 platform), please join the Lounge, the Warp 10 Community on Slack. |
Read more
Discovery Tips&Tricks #3 - Build a form
Using Warp 10 as a map tile server for Discovery
2021 recap: new functions and tools in the Warp 10 Platform

Junior Software Engineer
— Guest author —