This is a very detailed HowTo that covers maven/bintray publication, a necessary step to publish Warp 10 extensions.
Explicit Warning: if you master maven repositories, if you already did Warp 10 extensions, you can close this article!
Testing customer experience is necessary for any company. In this article, consider that I do not work for SenX, that I am an electronic engineer (true), that I know how to program, but that I did not practice java since I was a student. And that I do not know anything about java galaxy… And that I want to publish my "processing to raspberry framebuffer" extension for WarpFleet!
First, where is the WarpFleet documentation? Here.
First step: Contact SenX
"Contact us to save your group name and GPG key"
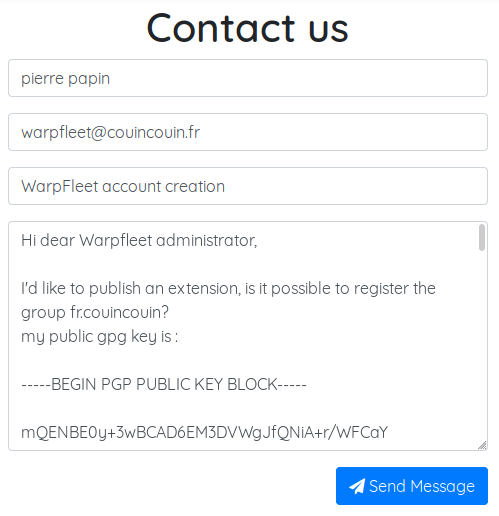
You can also send an email with your GPG key attached.
Install Warpfleet, create an empty extension
First things first, I need a git repo to host my extension. I will create an empty one on GitHub, It will be useful in the next step.
Then install WarpFleet. I won't detail how to use GPG or install NodeJS, there are enough tutorials on the web.
sudo npm install -g @senx/warpfleet
mkdir warpfleet
cd warpfleet
wf i
Lots of questions… What the hell is Maven repo URL? For the moment, I will write "WhatIsThat". This could be changed later.
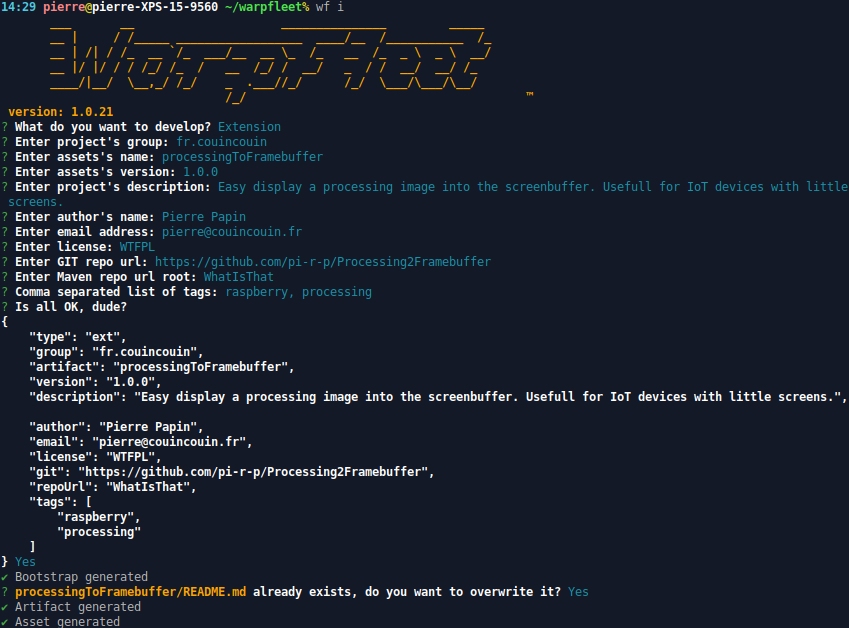
Nice, there is now a skeleton extension!
Time for the first commit…
git init
git remote add origin git@github.com:pi-r-p/Processing2Framebuffer.git
git pull origin master
git add *
git commit -m "initial commit"
git push --set-upstream origin master
If you did not initialize a git repo, you cannot compile. Gradle task requires one commit to name your build. You can now try to compile the extension skeleton:
./gradlew -Duberjar shadowJarBuild Successful! Time to code.
| Read more about WarpFleet Synchronizer, to synchronize your Git repositories |
Code the extension
If you want to speed things up, use an IDE. I use the free community version of IntelliJ IDEA, which is far powerful enough for me. There is a Gradle task to help you to setup your project:
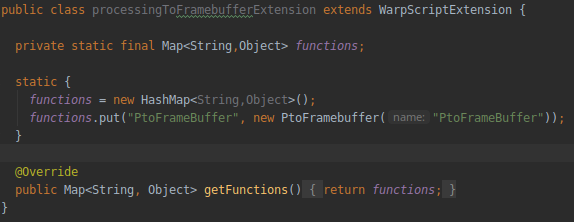
./gradlew ideaOpen the extension project with IDEA, select "import from gradle" when asked for. The first thing to do is to rename the PleaseRenameFunction and PleaseRenameWarpScriptExtension. Right click them and use the refactor/rename function of the IDE, and you're done. IntelliJ will do the git mv, don't care about that. The processingToFrameBufferExtension class will register the new functions you want to introduce to WarpScript. For my extension, there is only one function, PtoFrameBuffer:
My function to push a processing image to the frame buffer is also really simple:
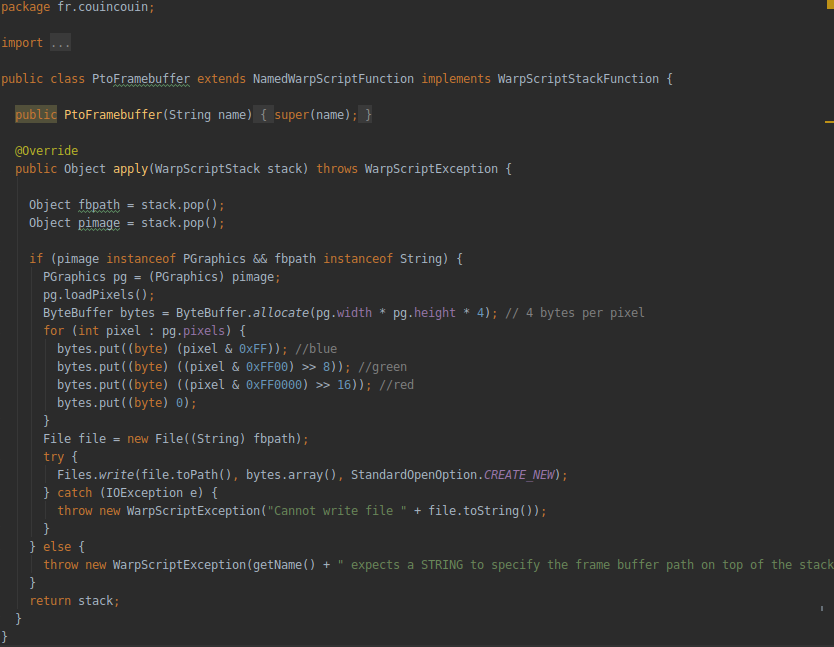
If you want to deep-dive this part, you can read the blog post about how to implement a Java function.
To get a correct jar name, you need to commit everything and put a tag on your repo:
git add *
git commit -m "version 1.0"
git tag -a "1.0" -m "version 1.0"
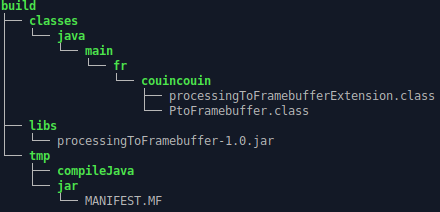
./gradlew shadowJarFine, my jar file is ready, version 1.0.
Quick test: copy the jar into your warp10/lib directory, then insert a line in your warp10 configuration:
warpscript.extension.fr.couincouin.processingToFramebuffer = fr.couincouin.processingToFramebufferExtensionNote the name after warpscript.extension is free. Best practice is to also start with your group name. The classpath on the right part is directly linked to the path in your src and build directory. The test is OK, I now have a new function called PtoFrameBuffer within WarpScript.
You can add the configuration line to the warp10.conf file inside your extension:
warpscript.extension.fr.couincouin.processingToFramebuffer = fr.couincouin.processingToFramebufferExtensionWhat should I do next with my jar file?
Publish the jar to a maven repository
For any java developer, "publish to a Maven repository" is crystal clear. If it is clear for you, jump to the next step.
A maven repo is a server to host your binaries (the jar file). I will create my own on Bintray, then update the wf.json and the build.gradle files. I will use Bintray, but it could be another one.
First thing first, I need to sign up for an open source repo on Bintray.

Then, create a new organization, named with your group name (not mandatory):
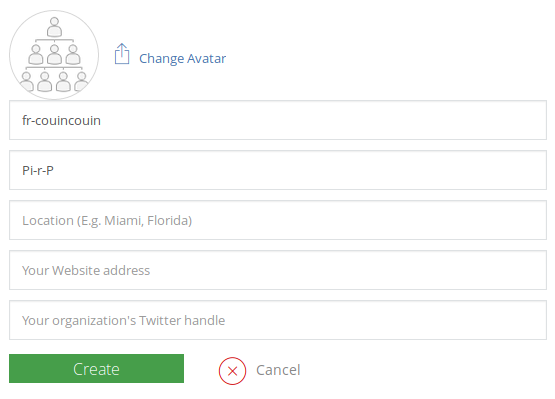
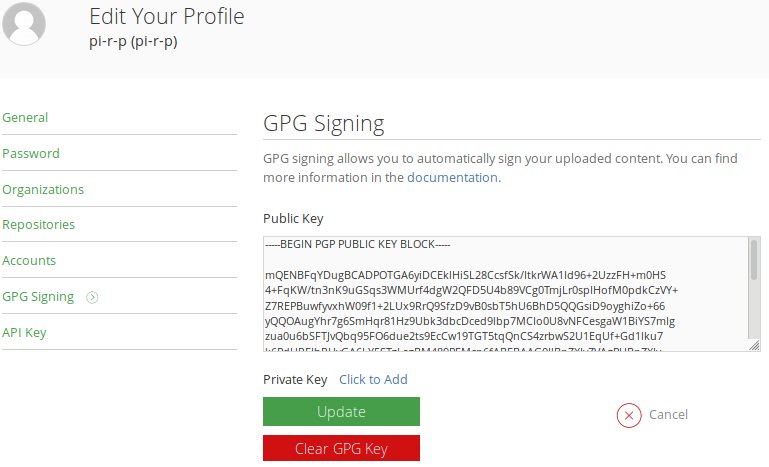
In your profile, put your public GPG key:
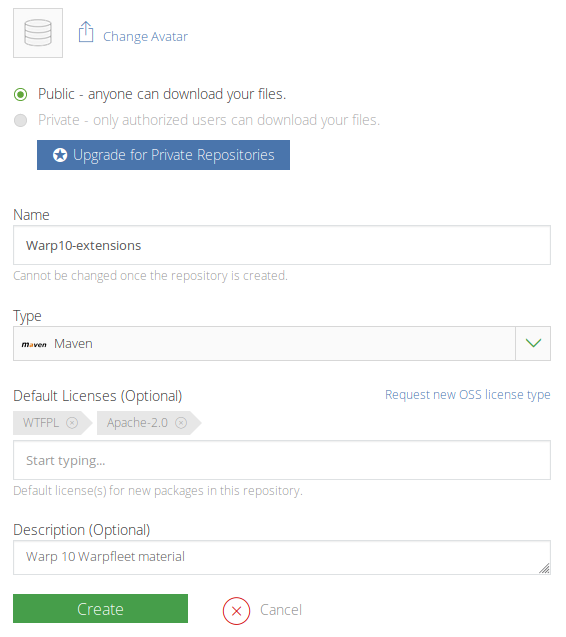
Then, create a new repository. I will name it Warp10-extensions
At this point, you can create a package manually, and manually upload a file… But the UI is far from obvious. A few more steps will allow you to automate the process. Gradle has a plugin to handle Bintray Repo, you just need to setup Gradle.
First, get your Bintray API key. In your account, look for API key. This key must never end up on a public repo… edit or create your ~/.gradle/gradle.properties, and insert your Bintray account configuration:
bintrayApiKey=40b6e59b69XXXXXXXXXXXXXXXXXb2610
bintrayUser=pi-r-p
bintrayUserOrg=fr-couincouin
Then, edit the build.gradle file in the extension root directory, and replace placeholders:
project.ext.bintrayRepo = 'Warp10-extensions'
project.ext.bintrayVcsUrl = 'https://github.com/pi-r-p/Processing2Framebuffer'
project.ext.bintrayLicenses = [ 'WTFPL' ]project.ext.'signing.gnupg.keyName' = '6AB58383DCCD31xxxxxxxxx4DD872'  (the id of your gpg key)
You might have trouble if gpg2 is not a valid command, even if gpg is installed. Just make a symlink to it:
sudo ln -s /usr/bin/gpg /usr/bin/gpg2Then the magic should happen:
./gradlew -Duberjar -Dpublish bintrayUploadThis should create the package, the version, push files, publish them… Your package is now located in: https://dl.bintray.com/fr-couincouin/Warp10-extensions/fr/couincouin/processingToFramebuffer/1.0-uberjar/:processingToFramebuffer-1.0-uberjar.jar. Ugly link… That"s Maven. Note the revision number is now "1.0-uberjar".
Publish with WarpFleet
Warning: revision number must be x.y.z. My initial version number is not OK for WarpFleet.
git tag -a "1.1.0" -m "version 1.1.0"
git push --tags
When I initiated the extension, I wrote WhatIsThat in maven repo. Now I can update the wf.json:
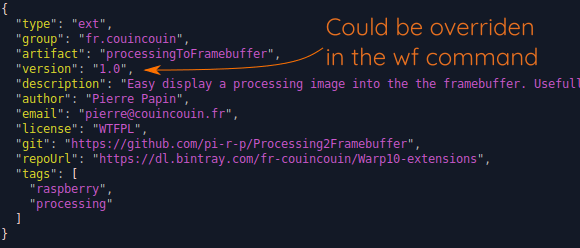
Now, I can publish the extension:
wf publish -g 6AB58383DCCxxxxxxxxxxAB57B4DD872 1.1.0-uberjarDone! You can now browse WarpFleet!

Update extension metadata on WarpFleet
If you want to change the description, just update the wf.json, and run wf publish -g 6AB58383DCCxxxxxxxxxxAB57B4DD872 1.0-uberjar again.
Update extension version on WarpFleet
Once everything is configured, updating the extension is easy. For example, I will check the stack depth before popping objects:

git add *
git commit -m "check the stack depth"
git push
git tag -a "1.2.0" -m "version 1.2.0"
git push --tags
./gradlew -Duberjar -Dpublish bintrayUpload
wf publish -g 6AB58383DCCD31D5CB214A9DD81C1AB57B4DD872 1.2.0-uberjar
Document your extension!
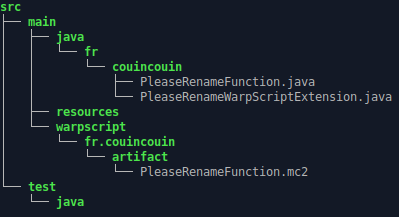
WarpFleet website can browse your jar to extract documentation. More than a README, your extension functions could be documented like all the Warp 10 functions, with the same look and feel than warp10.io. Again, the template will help you. Look at your src directory:
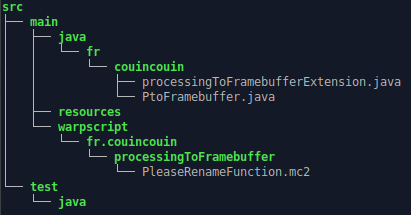
The WarpScript mc2 files in src/main/warpscript/group/artifact are your function documentation. They follow the same documentation pattern as all the existing WarpScript functions. Rename the file with your function name, and fill the placeholders in the file. The most important fields are name (function name) desc (free Markdown text), sig (the signature(s) of your function), params (the description of parameters in the signature), examples (one or more WarpScript examples).

Again, update your extension with the doc:
git add *
git commit -m "added doc"
git pushgit tag -a "1.6.0" -m "version 1.6.0"
git push --tags
./gradlew -Duberjar -Dpublish bintrayUpload
wf publish -g 6AB58383DCCD31D5CB214A9DD81C1AB57B4DD872 1.6.0-uberjar| Learn more about when do you need a Time Series Database |
Conclusion
- Extending WarpScript require a bit of Java knowledge, but the templates will really help you to start.
- Publishing extensions is easy when you know how to automate maven tooling. That is really not obvious, and this article is here to help you!
I hope this article will help data scientists willing to code and publish Warp 10 extensions!
If you need more help, you can ask on Google group or Stack Overflow.
Coming soon: Warpfleet for macros packages.
Read more
WarpFleet Gradle Plugin
Alerts are real time series
Getting help from Warp 10 community

Electronics engineer, fond of computer science, embedded solution developer.